|
The chain is almost finished, only one segment left.
|

|
Closeup of a part of the chain, showing the segments.
I need one more to get the chain complete.
|

|
I usually start by layin out the rings I need for a segment. Not that it works better
this way but I always like to see the work progress. I also have a possibility to
choose the better rings for the more visual parts of the segment.
|

|
I start by doing four closed rings. It's easier than do it with the chain hanging.
|

|
I'm working my way from right to left. The last ring is one size bigger and is
used for connecting the segments together.
|

|
Then I collect all four rings on one ring. This is the start of our chain.
|

|
When that is done, I add one more ring parallell to the previous...
|

|
... creating a three part double chain.
Next step is to fix one end with a metal wire.
This one is a tin coated copper wire, but any metal wire works. It is there only
to make it easier to handle the chain.
|

|
Then it's time for the trick. Just pull back the lower two rings and hook a
new ring through the middle pair of rings.
|

|
Now I have added another one parallell with the last one. Be careful with theese rings
because they are the central part in the segment and any mistake easily stands out.
|

|
Now we repeat the process a second time. Close two rings and connect them with
a pair of rings to the bottom of the chain.
|

|
Turn the two lower rings upp and connect a pair of rings on the second lowest pair
and the segment is finished.
|

|
Use the last ring, the one a bit bigger, to connect the segment to the chain.
|

|
And the chain is finished!
|

|
A closeup of one segment.
|

|
The bottom part of the chain is made by connecting a number of segments with
the last rings at the same time the dimension of the rings are changed.
Four different diameters of wire is used here.( 1, 1.2, 1.5 and 2 mm)
|

|
Another view of the central part. As seen the middle part consists of only ten
2mm rings, while the two next steps each contain twelve rings and the ends are
made up of fourteen 1mm rings.
|

|
A third view of the central stepped part, the graduated part.
|

|
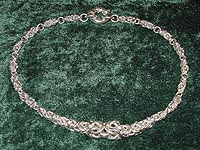
And here is the finished chain. I polish it lightly with a brass brush and some soap.
|

|
This is the jigg I'm using for cutting out the rings. I have modified the jigg
since then but the basic design is the same, just a wooden block with a few
different sized holes and a groove to use as guide for the saw.
I also have bought a goldsmiths saw with really thin blades. The cuts are
smoother and if you make a wide cut then the ring will be narrow.
The sanding paper is used to get rid of small pieces of silver that the saw
didn't remove.
|

|
Theese are the pliers I used. All flat or rounded so I don't damage the
surface of the rings.
Today I have made some special pliers but this is all you really need.
|


